DIY Lighter Covers
Disclosure: Some of the links below are affiliate links. If you click through and make a purchase, I will earn a small commission.
Looking to add a personal touch to your lighter while keeping it reusable? Then this DIY is for you! Read on to learn how to create a custom, removable case for your lighter. Plus, this also makes a cute and thoughtful gift—whether you give it as is or pair it with a candle! (My current favorite candle is Moonlight Orchard from MOCO Fragrance, a small, women-owned, eco-friendly candle company—perfect for fall! Enjoy 20% off your order at MOCO Fragrance with the code COURTNEYM20)
Supplies:
Parchment Paper
Blue Tape
Caulking
Decorations of your choice! Here are links to some of the embellishments I’ve used for these cases:
Step 1: Create the Case
First, we need to start by making the lighter case. Cut a piece of parchment paper that covers the lighter completely (including the bottom of the lighter too!) and secure it with blue tape. Make sure it’s snug enough to stay on, but not too tight so it can easily be put on and off when the lighter runs out.
Step 2: Apply the Caulking
Once your case is made, I like to put the case on my finger and then cover it with caulking. Apply an even layer all around the case and get creative with the texture by swirling the caulking around with the tip of the tub to create a nice finished look!
TIP: Use the tip of the caulking tube to create a fun texture!Step 3: Decorate!
Now for the fun part: decorating! Use crafting tweezers to help you place small embellishments onto the caulking. Whether you go for a full-coverage design or a few well-placed accents, make sure to apply them before the caulking sets!
Step 4: Let It Dry
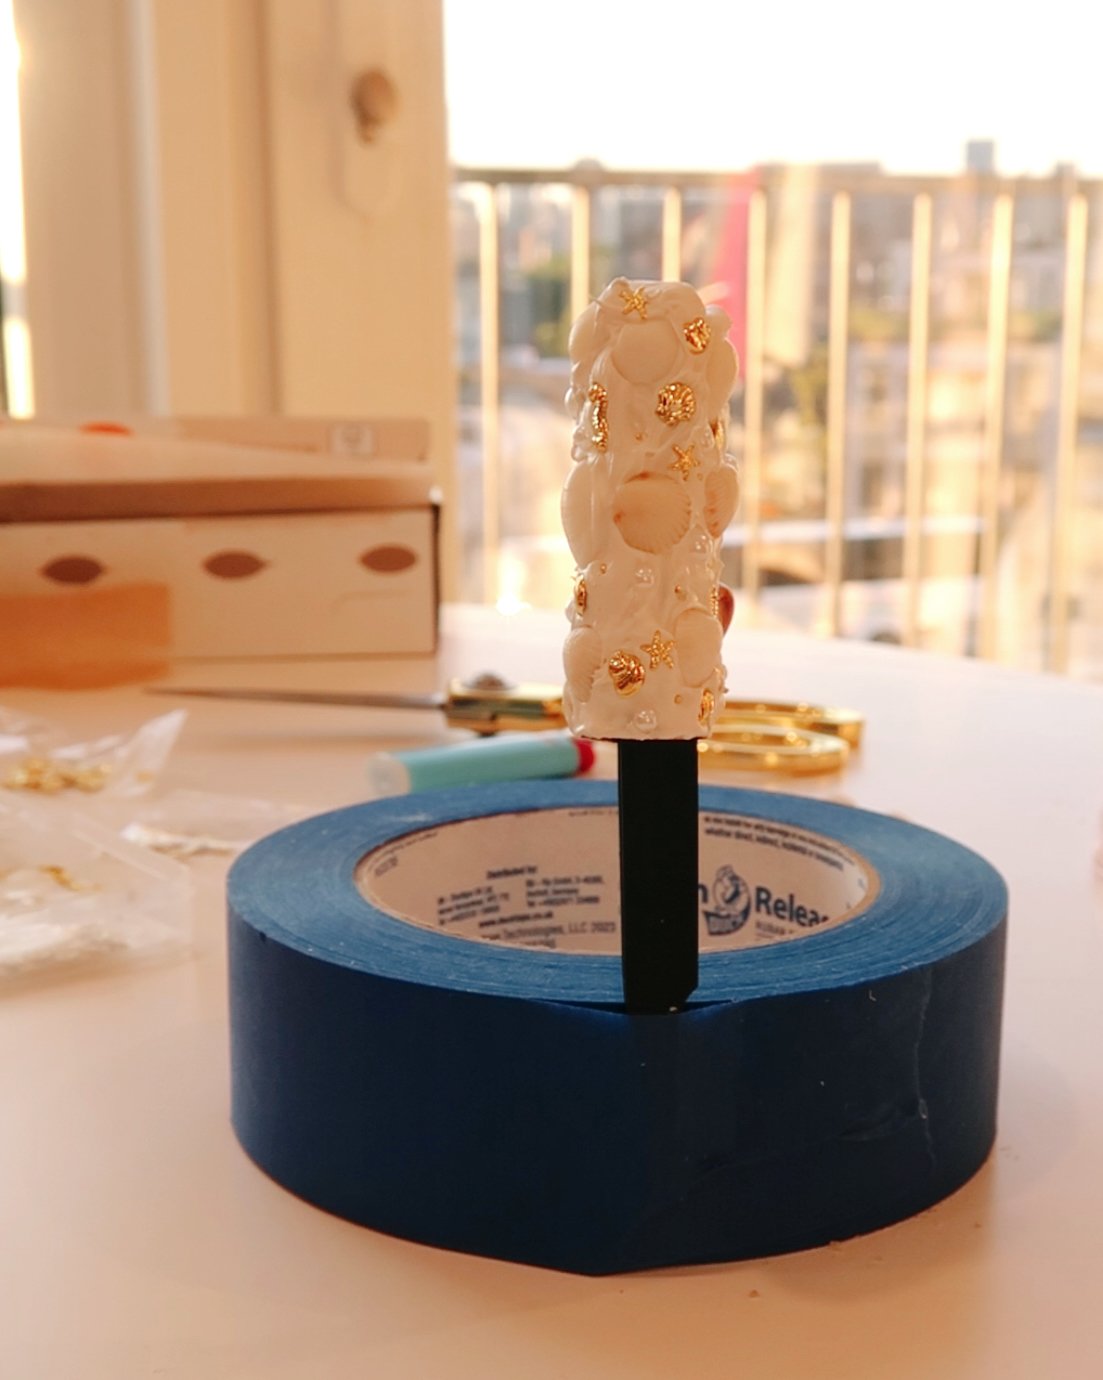
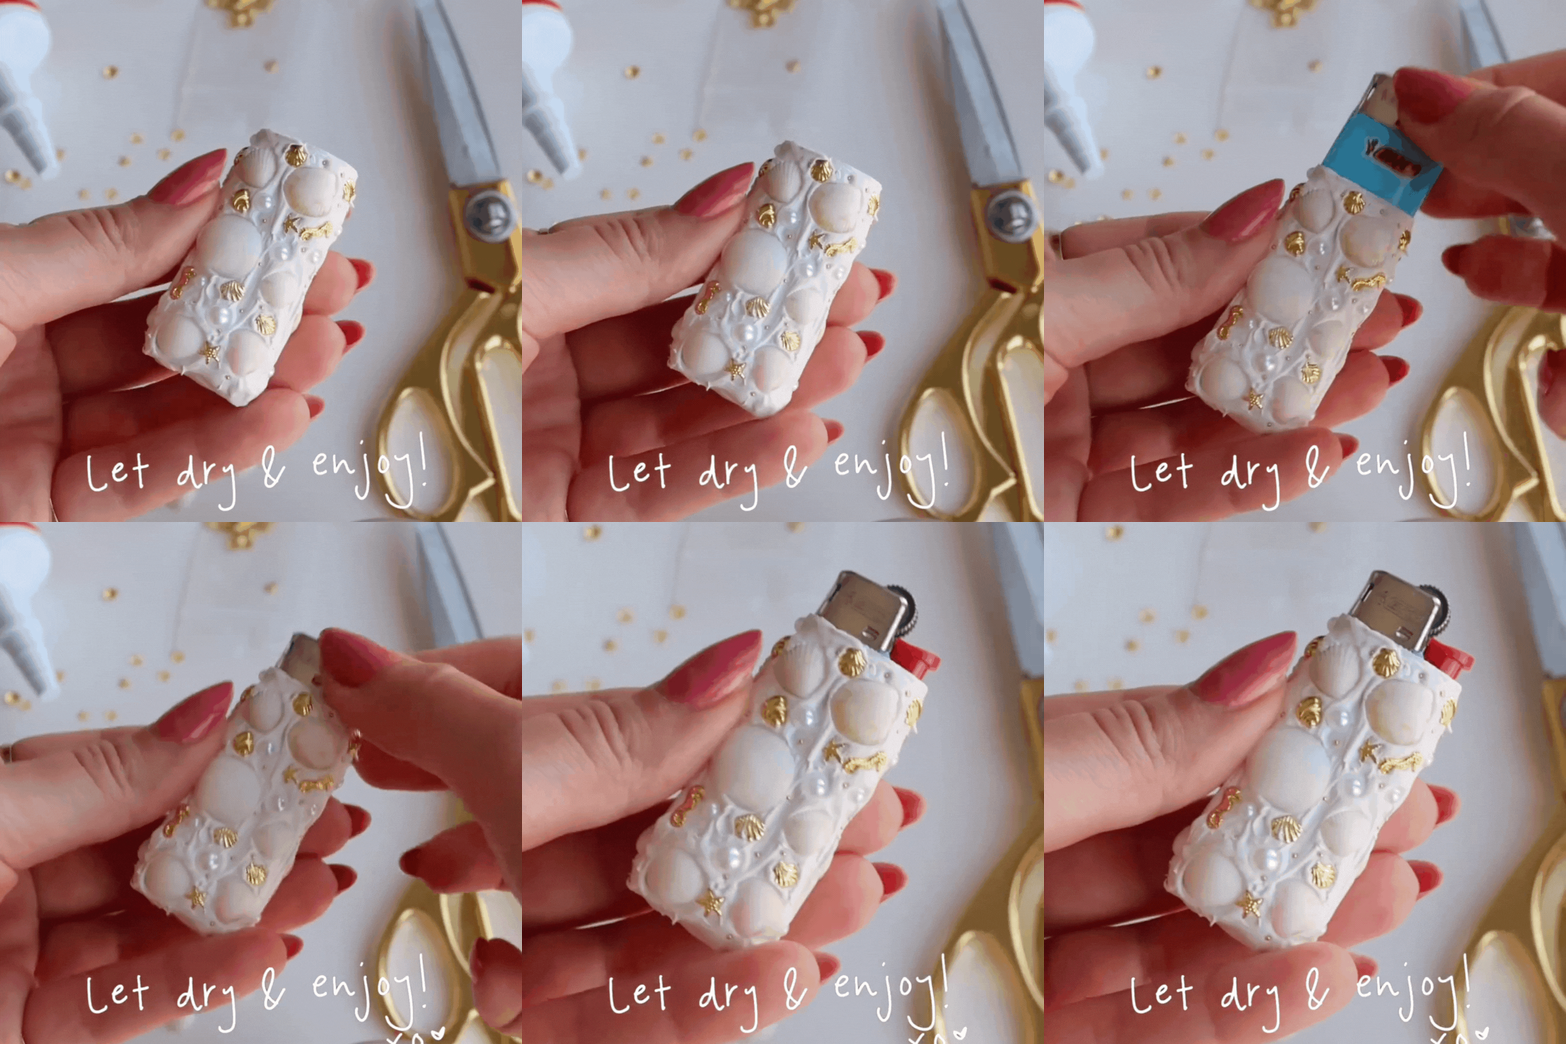
Once you’re happy with your design, let the case dry completely. Use crafting tweezers to transfer the case off of your finger and place it upright for drying. (I tape the tweezers in the tape roll—see photo for an illustration!) Once it's dry, slide the case onto your lighter and enjoy your personalized creation or gift to a friend!
This is the final look! Would you give it a try? If you have any questions or try this DIY out send me a DM on Instagram @its.courtneymichael
If you try this DIY, feel free to DM me or tag me on Instagram @its.courtneymichael—I’d love to see what you create!


